
My Art Process – Coming up with Ideas
Hello and welcome to Partyness! I have been painting, drawing, and crafting since I was in elementary school, so I have figured out a process on how to create my art. In this blog post, I’m going to go over the first step in my art process – coming up with the idea!
Step One – What to Create
The first thing that you’ll want to figure out is what you want to create. Do you want to sew something? Make a sculpture or pain
ting? Whatever it is that you want to do, make sure that you feel excited about starting it.
Step Two – Inspiration
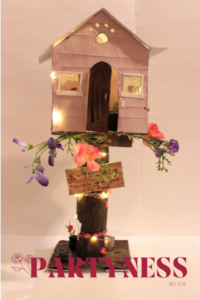
The second step is to find inspiration. Now, I know inspiration doesn’t just come out of nowhere. What I like to start with are very broad categories. An example may be, do I want my piece to have a deep meaning? Or do I want it to just be fun and silly? Or even, do I want to use bright colors or darker, moody colors? This will help you narrow down what you want to do and where you can then get inspiration from. For example, for the treehouse on the right, I wanted to make something that was just fun and cute. To get inspiration, try scrolling through pictures that you have taken or art pieces that you like.
Step Three – Brain Dump
The third step is the most fun in my opinion – a brain dump! Grab your sketchbook or some paper and different colors of markers, pens, highlighters, or pencils. Don’t rush this part; you’re trying to get all of your ideas out on paper. What’s good about this is that it allows you to think creatively and come up with ideas that you will be excited about. A brain dump can include writing about the mood of the piece, the meaning, the colors, the composition, etc. It can also include little drawings or doodles. Don’t worry about writing or drawing the wrong thing or messing it up. Even random notes or drawings that you don’t think are very good can help you come up with your final art idea.
Step Four – Final Draft
The last step before actually creating it is to sketch out a final draft of what you want your piece to look like. Take your time and add details. Make sure to include written notes as well. For example, if you are making a 3D sculpture, add dimensions and what materials you will use. For a mixed media piece, point out which parts of the pieces you use each medium for.
Once you have finished the last step, you are ready to go for it! Don’t worry about something not being perfect; you can always change up what you’re doing even if you are in the middle of your piece. If you wait for everything to be perfect, you’ll never be able to create anything!
In my next blog posts, I will cover the next steps to my art process. This includes the actual creation of a piece as well as photography.